


↑Click to Expand.
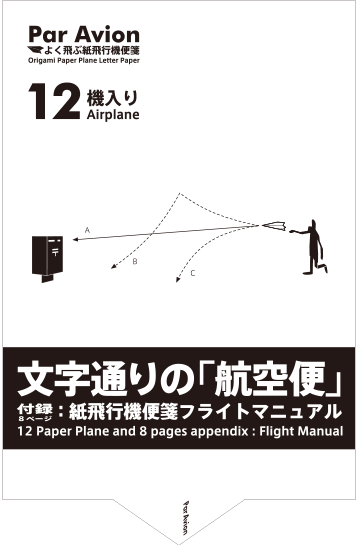
left:Package, Main body(3P) / right:Flight Manual (8P)
・Main body:12 airplanes 156×240㎜
・Flight manual (Instruction)8pages 156×240㎜
PACKAGE SIZE:156×240㎜
Flight Manual
The paper plane symbol is often used as an icon to send e-mails, but wouldn't it be great if we could make letters that actually flew to their destination? And not only fly, but fly well. Very well. Letters that literally fly to the post box, or as the French say; 'Par Avion'. For it was Frenchman Saint Exupéry who taught us the true beauty of the airplane.
Better performance with stamp
No matter how well you fold your paper gliders, as soon as they leave your hand (while they're gliding) the folds will always open slightly. This changes the aerodynamic stability of the plane, causing the performance to drop. This issue has been solved with the help of postage stamps. With 'Par Avion' stamps hold your paper glider in shape, ensuring aerodynamic stability.

Designed to fit the size of postal slot
Our paper planes have been designed to fit the requirements of the postal service being over the 9cm X 14cm minimum size, and below the 3cm maximum height for posting in a post box. This model follows the simple design known as the 'navel plane' or 'belly button glider' but has been modified to reduce the height of the fuselage which acts as a vertical stabilizer. To avoid loss of stability due to reduced surface area, the fuselage has been extended aft enabling stable flight. This elongated tail has become a distinguishing feature of the plane.

The allure of paper planes Enjoying free flight
Upon leaving your hand, paper planes are free to glide on the wind. While radio controlled airplanes need our full and constant concentration, after launching your paper plane you are free to relax and enjoy watching it glide. That is what makes paper planes so special.
How to make your origami paper plane
The key to making the best origami paper planes is simple: Fold carefully.
Make sure folds are pressed down carefully and firmly so they do not re-open. Check the fold line, and fold carefully and with even pressure to prevent unwanted creases and distortion. Run over the fold with a fingernail or the back of a knife to ensure a clean fold. Rulers can be used for longer folds.

Fun ideas for use
| On the street corner
A direct flight to the post box. |
 |
| At school
Send a secret message to your favorite teacher... |
 |
| At work Leave no trace of that important letter. |
 |

Test Flight (adjusting your paper plane)
When conducting test flights outdoors, chose a quiet place with no wind. When flying indoors, aim towards a curtain to avoid damaging your plane. Do not throw your paper plane upwards for the test flight, but hold it horizontally, and gently push it forward before releasing and allowing it to glide. (Figure 1-1)
Before the Test Flight: Checking the center of gravity
The center of gravity for this model is preset, but can be checked by balancing the plane on an open pair of tweezers at the mark on the fuselage. (Figure 1-2)
If it does not balance, use adhesive tape as necessary for ballast.
When attaching stamps, do so carefully making sure the center of the stamp aligns with the center of gravity. (Figure 1-3)
Before the test flight: Fixing distortion
nspect your plane thoroughly from the front for any distortion in the fuselage or wings. Straighten out any warps or twists carefully. Also, check that both wings are inclined at the same angle. (Figure 1-4)
Test Flight (adjusting the plane)

Test Flight: Step 1 (lateral stability)
Adjust the plane to fly straight without veering left or right.
First, inspect your plane from the front and check for any distortion in the fuselage or wings. Straighten out any warps or twists carefully. Also, check that both wings are inclined at the same angle.
If the plane does not fly straight even though there is no noticeable distortion, try adjusting the trailing edges of the wings as in the figure. (Figure 2-1)
Test Flight: Step 2 (vertical stability)
Adjust the wings so that the nose of the plane does not rise up and loose speed, or drop to the ground. If your plane is properly adjusted, it should fly smoothly as in path A in the figure. (Figure 2-2)
A : Just right
B : Bend the trailing edges of the wings down slightly
C : Bend the trailing edges of the wings up slightly

When adjustment is complete Once your plane has been adjusted, do not touch the wings. Always hold your plane by the nose. (Figure 2-3)

Flight Instructions
If you toss the plane up with the wings horizontal, it will tend to 'loop the loop' and return straight back. To achieve a longer flight, tilt the plane at a 45°-60°angle and throw it diagonally upwards as in the figure. The plane will circle around gaining altitude before leveling off and gliding smoothly. (Figure 3-1)
When launching the plane, toss it like a javelin to keep the plane fuselage on the desired course.
| Controlling your plane
Controlling the following two points will allow you to fly your paper plane well. (Figure 3-2) |
 |
| Lateral control Lateral turning is controlled by bending the trailing edges of the wings and the trailing edge of the body (which acts as the vertical stabilizer) as shown in the figure. (Figure 3-3) |
 |
| Vertical control Vertical movement is controlled by bending the trailing edges of the wings as shown in the figure. If the plane tends to 'loop the loop', bend this part down slightly to keep the nose of the plane down. (Figure 3-4) |
 |
How paper planes work
| Angle of attack and lift
Origami paper planes fly best when the nose is pointed slightly up. The angle between the wing and the flight path creates lift as in the figure. This angle between the wing and the flight path is called the angle of attack. (Figure 4-1) |
 |
| Glide ratio and lift-drag ratio
As shown in the figure, the ratio between the altitude of the plane and the distance it will glide is called the glide ratio. The glide ratio is equal to the lift-drag ratio of the entire plane. Wings with a higher lift-drag ratio perform better, however there is little room for adjustment in origami paper planes. As paper quality plays a large part in the performance of origami paper planes, choosing smooth paper is an effective way to reduce drag and increase performance. (Figure 4-2) |
 |
| Tail size and leverage
The tail works on the principle of moment around the center of gravity. Effectiveness of the tail is called tail volume, and is the product of the tail size and the distance from the center of gravity. In order to obtain the same effect from a smaller tail, it must be moved further from the center of gravity. For Par Avion to fit in the post slot, the height of the tail has been reduced, and the tail extended further back to compensate. (Figure 4-3) |
 |
References
| Night Flight by Antoine de Saint Exupéry | (Shinchosha) | Famous Airplanes of the World No. 131 Lockheed P-38 Lightning | (Bunrindo) |
| Scale Aviation - all issues | (Dai Nippon Kaiga) |
| Reisen no Isan by Jiro Horikoshi | (Kojinsha) |
| Kakusareta Hiko no Himitsu By Kanichiro Kato | (Kodansha) |
| Mokei Hikoki - Riron to Jissai by Terushige Mori | (Denpa Jikkensha) |
| Kami Hikoki de Shiru Hiko no Genri by Akio Kobayashi | (Kodansha) |
| Origami Hikoki Shinkaron by Takuo Toda | (NHK Publishing) |
| Yoku Tobu Kamihikoki-shu by Yasuaki Ninomiya - all issues | (Seibundo Shinkosha) |
